.png)
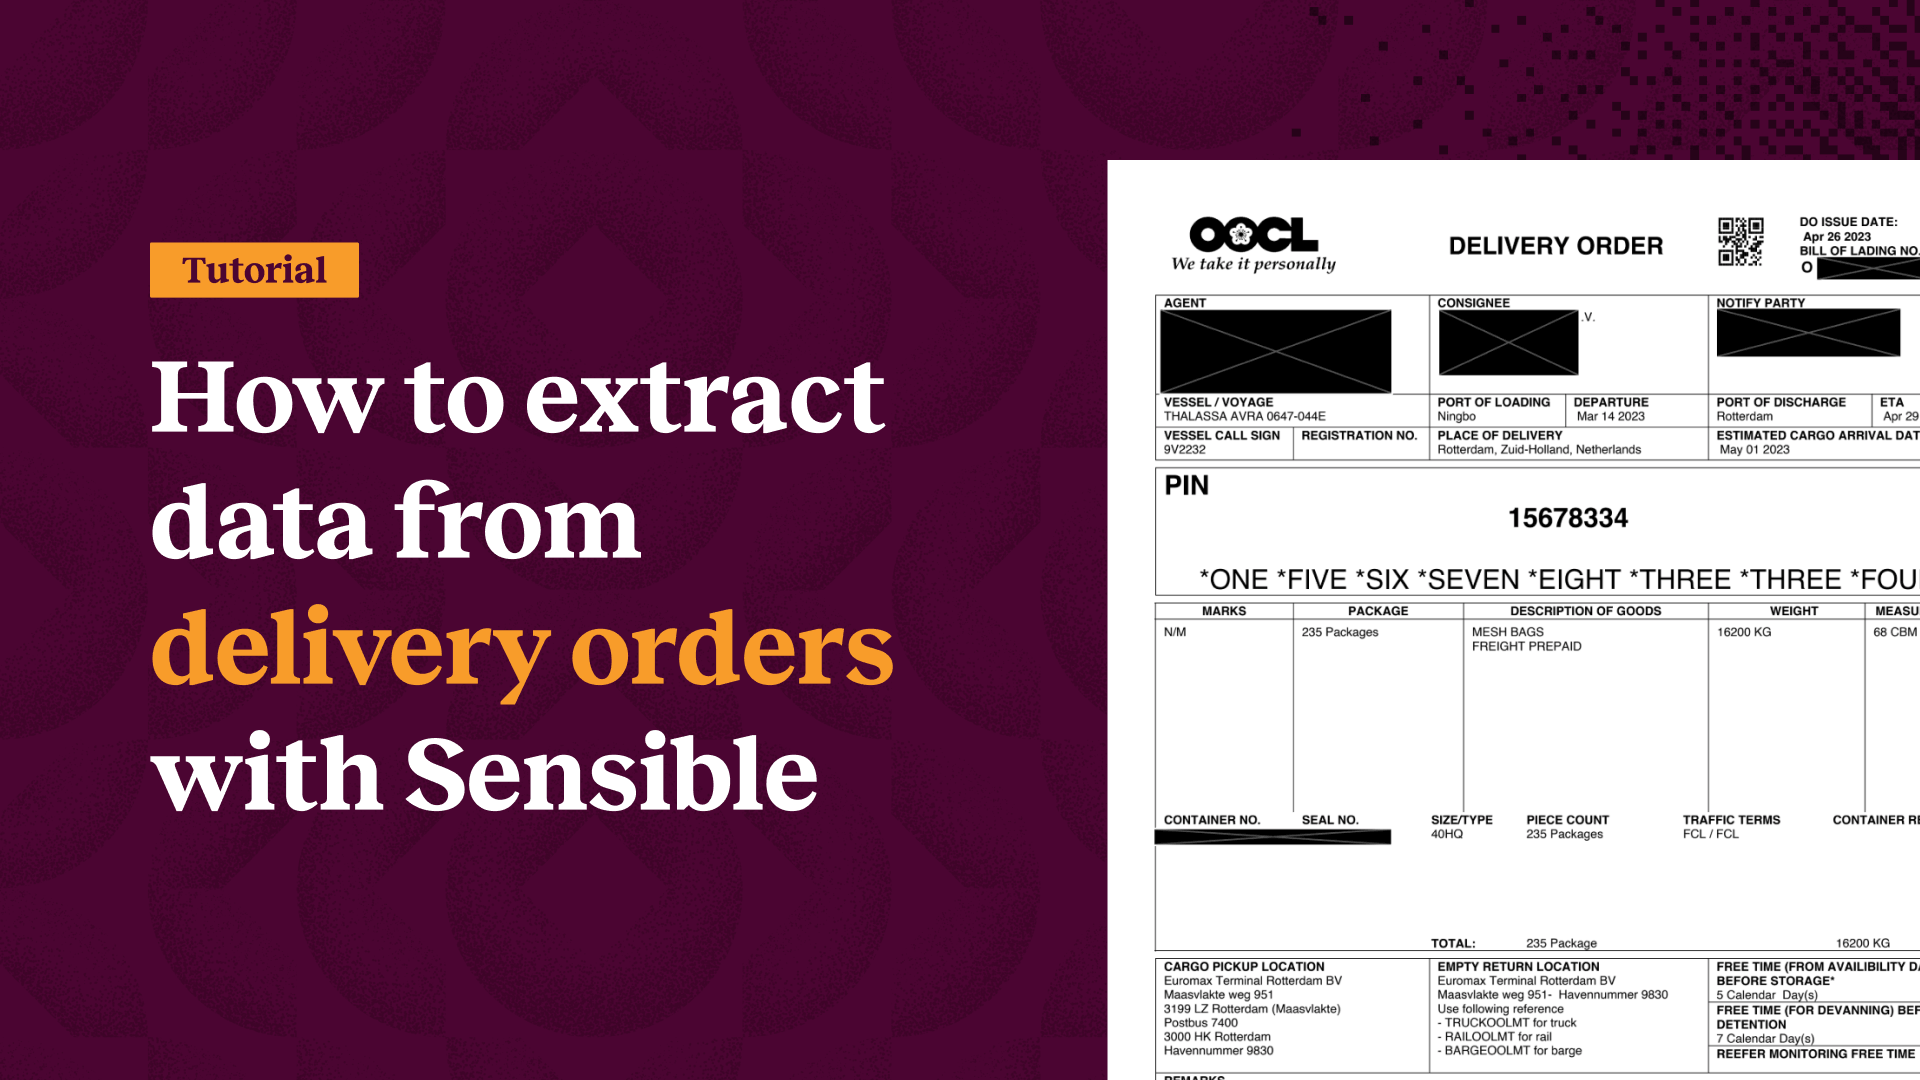
The Challenge of Paystub Processing at Scale
In the world of document processing, the Pareto principle often applies: 80% of your document volume comes from 20% of vendors or providers, while the remaining 20% of volume spans across dozens of smaller, regional, and niche vendors. This principle holds true whether you’re extracting transaction information from bank statement PDFs, energy use from utility bills, or coverages from insurance declaration pages.
In this tutorial, we'll implement an 80/20 data extraction approach for paystub document processing. For the 20% of high-volume providers like ADP, Paylocity, and Gusto, it makes perfect sense to invest in tailor-made, document-data extraction configurations that can handle their consistent document formats with speed and accuracy. But what about the long tail? Companies like BizChecks Payroll (Cape Cod regional) or OnPay (agriculture/nonprofit specialist) each have their own unique formatting that would be impractical to support with individually tailored extraction configurations.
Enter SenseML, Sensible's query language for document automation. With SenseML, you can create dedicated layout-based extraction configs tailored to your high-volume providers, then intelligently handle the long tail with an LLM-based extraction config. Whether you're processing paystub data for lending applications, expense management, or compliance reporting, you can then use Sensible to enforce a consistent data output schema of your choice across all documents. From there, your extracted data is accessible via API, the platform UI, or thousands of other software integrations through Zapier.
What We'll Cover
This tutorial focuses on comparing layout-based and LLM-based document data extraction methods, showing you how each approach handles the same data points differently and when to use each strategy. We’ll focus on a couple of major vendors (Paylocity and ADP) and use a generic paystub example for the long tail.


Sensible’s prebuilt support for paystub data extraction is comprehensive. To keep it simple, this blog post will walk you through extracting a couple key data points from paystubs using different approaches:
- Employee address
- Regular pay for this pay period
We’ll use the following example documents:


By the end, you'll understand several SenseML methods, you’ll understand strategies for extracting data from major vendors’ documents versus the long tail, and you'll be on your way to extracting any data you choose using our documentation or our prebuilt open-source configurations.
Prerequisites
To follow along, you can sign up for a Sensible account, then import paystub PDFs and prebuilt open-source configurations directly to the Sensible app using the Out-of-the-box extractions tutorial.
The 80/20 Extraction Strategy
Before diving into specific extraction techniques, let's understand when to use each approach:
Layout-based methods (80% of volume, 20% of vendors):
- Suitable for high-volume document providers with consistent formats (predictable field positioning and labels)
- Offers fast, deterministic extraction
- Worth the investment in extraction config development
LLM-based methods (20% of volume, 80% of vendors):
- Suitable for regional and niche providers (varying layouts and field positioning)
- Offers faster implementation (single extraction config handles multiple providers)
Pre-extraction vendor identification
First, let's walk through identifying different paystub providers, so we:
- route high-volume vendors’ paystubs to the appropriate extraction configs and
- let the long-tail ‘fall through’ to the LLM-based configs.
We'll use “fingerprints” for this classification process. (Note that classifying the document generally as a paystub happens upstream and isn't covered in this tutorial.) Fingerprints help Sensible quickly determine the appropriate layout-based or LLM-based extraction queries to use before attempting to extract data from a document.
Paylocity fingerprint
The Paylocity fingerprint tests for the presence of the "paylocity" text anywhere in the document, which reliably identifies documents from this provider due to their consistent branding:
ADP fingerprint
The ADP fingerprint uses two distinctive elements: the exact "Earnings Statement" title and the "Period Ending:" label format. Both tests must pass for Sensible to identify this as an ADP document and route it to the appropriate extraction queries:
When a document doesn't match any fingerprints (like the generic paystub example in this post), it automatically routes to the LLM-based config.
Extract Employee Address: Spatial vs. Semantic Approaches
Let’s start by extracting the employee address. You’ll learn how to extract this multi-line, variable-length field with an LLM-based approach, then with varying layout-based, or spatial, approaches.
General LLM Approach
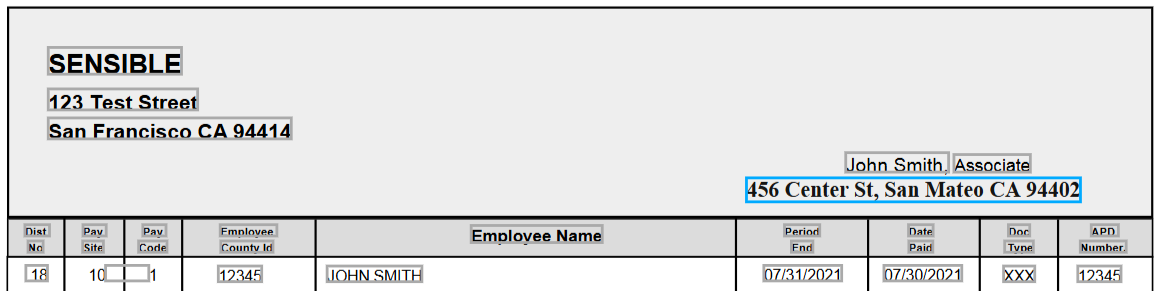
In the generic example document, the single-line employee address is near the employee name:
To extract the address from long-tail vendors, the LLM-based config uses a primary LLM prompt and handles LLM errors with a fallback prompt:
This approach uses natural language processing to locate the employee address regardless of positioning, even providing instructions to handle edge cases like multiple addresses. It also provides error handling by chaining prompts in an agentic fashion: If the LLM can’t find the complete address in the first prompt, it falls back to extracting each part of the address with simpler prompts, then concatenates them together.
Extracted output:
Sensible returns the following results, along with a qualitative measure of confidence in the accuracy of the LLM’s answer.
Paylocity: Region Method
Now let’s turn from generalized LLM methods to a highly specific, layout-based approach for a big-name vendor, Paylocity.
Paylocity always places employee information in the area bounded by the green box in the following image:

Since the region is consistent, we can extract all the text from that rectangular box using the Region method:
This extraction method anchors on "employee id" and extracts text from a rectangular area. It both formats the output and filters out unwanted text using the Address type. The Region method is fast and reliable when you know exactly where the address appears.
Extracted output:
ADP: Region with Filtering
ADP’s layout of the employee address is also suited to extraction using the Region method:

ADP address extraction with region:
The extraction region’s inch coordinates and anchor differ from those used in the Palocity extraction config, but the principle is the same.
Extracted output:
Schema normalization across LLM- and layout-based extractions
Note that across the generalized LLM-based extraction configuration and the layout-based extractions, you keep the extracted data schema consistent. For example, you use the same id for each field you extract ( employee_address) and enforce consistent formatting for the value output using the Address type. There’s more power to be unlocked here too – you can specify any JSON output schema you need using postprocessors, making it easy for your application to handle data from any paystub provider with the same business logic.
Extract regular pay
Let’s walk through extracting the pay stub’s regular pay for the current period to show how layout-based methods excel at precise table extraction, while LLM methods provide universal flexibility.
Chain LLM prompts to extract regular pay
The LLM approach is to first extract the pay table, then chain prompts to extract individual cells from the table. We extract individual cells in this instance in order to normalize the output schema against the layout-based extraction configs, which we’ll explore in following sections.
This approach works regardless of table structure, label variations, or positioning.
Extracted results:
Sensible extracts the earnings table:
To find the regular pay in the extracted table, use the following chained prompt:
Extracted output:
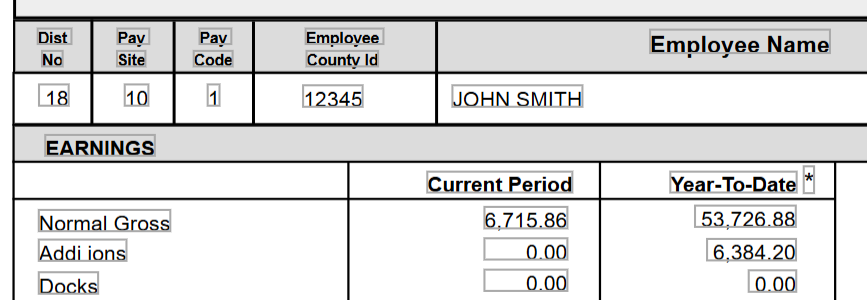
Paylocity and ADP: Intersection method
In contrast to the long tail, Paylocity organizes pay in a predictable table structure, perfect for the layout-based Intersection method:

This config finds a "regular pay" row within an earnings section and extracts a currency value at the intersection of that row and an “amount” column.
The ADP extraction config also uses the Intersection method since it has a similar layout:

Note that ADP takes a slightly different approach in determining which row and column labels to target for the table cell intersection. Since it’s more reliable to match on single-word columns, ADP takes the approach of matching the “hours” column and then offsetting by a fraction of an inch (.07) to match the “this period” column:
Extracted output:
Congratulations! You’ve walked through extracting a couple data points from paystubs, and learned different strategies for generalized LLM-based extractions versus tailored, layout-based extraction strategies.
Implementing the 80/20 Strategy
To implement this approach in your document processing system:
- Identify your high-volume providers - Analyze your document volume to find which vendors represent 80% of your paystubs
- Create layout-based configs - Build precise, fast configs for your top providers using methods like Region, Row, Table methods, and Label
- Develop an LLM fallback - Create a general config using Query Group or List methods that can handle any paystub format
- Use fingerprinting - Implement document classification to route each paystub to the appropriate config
- Monitor and optimize - Track extraction accuracy and adjust configs as needed
This hybrid approach maximizes both efficiency and coverage, ensuring you can process paystubs from any vendor while maintaining optimal performance for your highest-volume sources.
Conclusion
The 80/20 principle provides an optimal strategy for document data extraction at scale. By using layout-based methods for consistent, high-volume providers and LLM-based methods for the diverse long tail, you can build an automated document processing system that's both fast and comprehensive.
Ready to implement document extraction in your application? Book a demo to see how Sensible can help you build a robust document processing pipeline, or check out our managed services for customized implementation support. Or explore on your own: sign up for an account, check out our prebuilt extraction templates in our open-source library, and peruse our docs to start extracting data from your own documents.
.png)